On-Premises SQL Database Transactional Replication to Azure SQL Database
Enable SQL server replication:
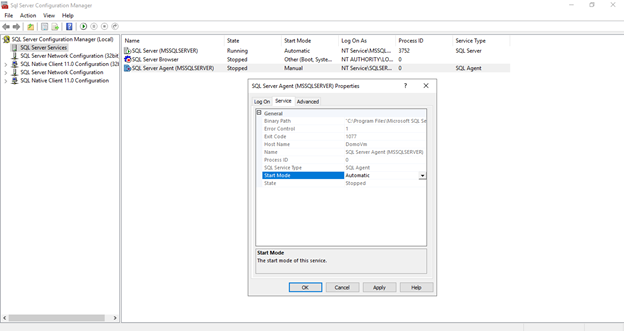
For DB replication, we need to enable the SQL Server Replication feature.
SQL Server Agent should be Automatic start Mode. We can configure that from SQL Server Configuration Manager.

Create Distributor:
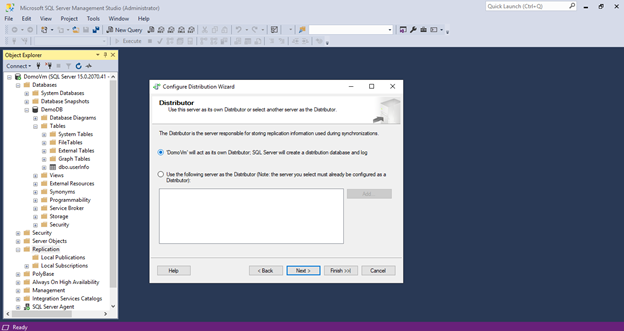
1. Browse Object Explorer and locate the Replication folder. Right-click and select Configure Distribution.
2. Now, it displays the Configure Distribution Wizard page. Click Next to proceed to the next window
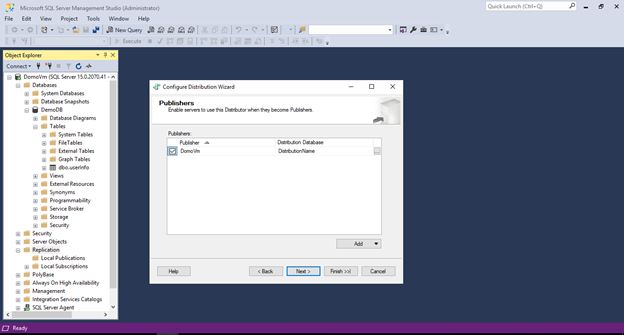
3. Next, as the setup is configured with local distributor, choose the default setting “ServerName will act as its own Distributor; SQL Server will create a distribution database and log” and Click Next
4. Configure the Snapshot Folder. As this is a demo setup, I’ll go with the default values and click Next

5. In the Configure distribution database page, select the defaults and proceed by clicking Finish button.
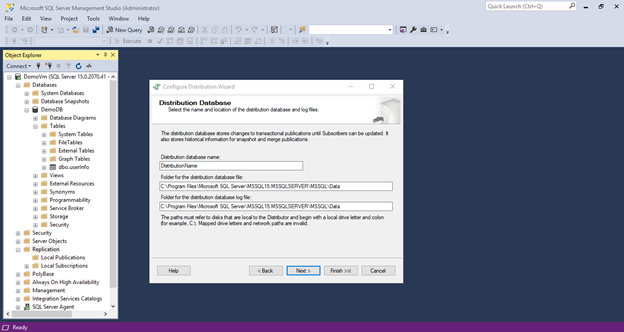
6. In the Configure distribution database page, select the defaults and proceed by clicking Finish button.
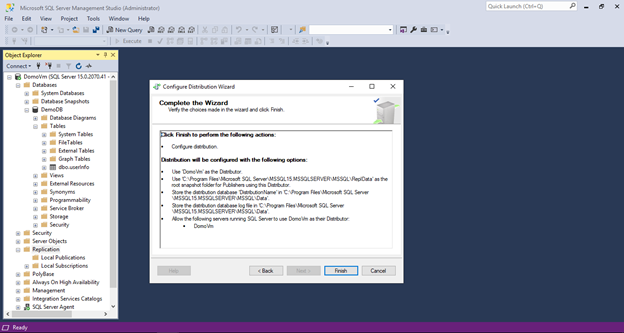
7. In the Complete the wizard page, review the summary and then click Finish to complete the configuration of the distribution database
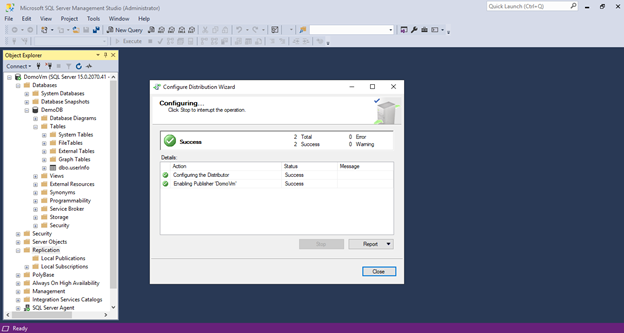
8. Next, in the confirmation page, you would see the progress of the entire distributor setup
Configure Publisher:
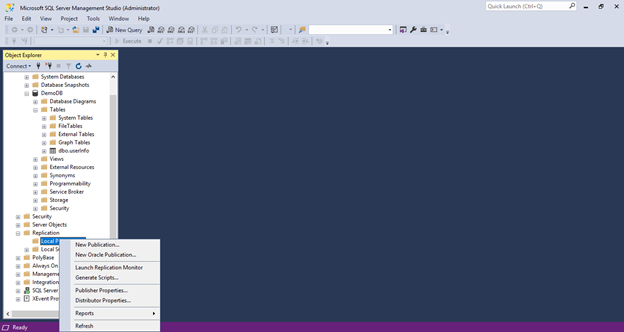
1. Browse Object Explorer, locate the Replication folder, right-click Local Publication, and then click New Publication
2. In the Publication Wizard, click Next
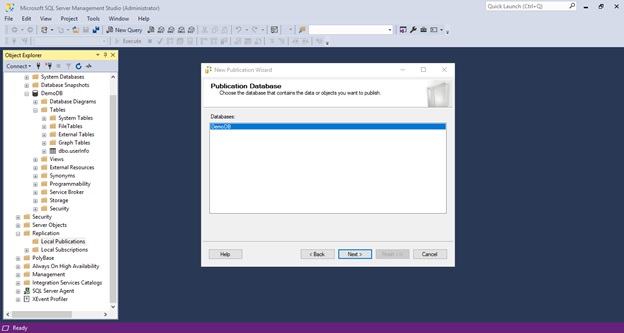
3. On the publication database page, select the “DatabaseName” database and click Next
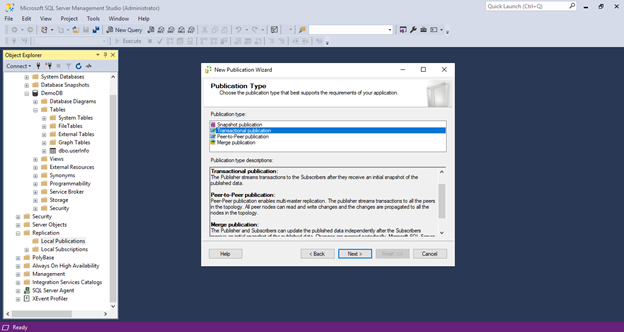
4. Next, select Transactional publication as the Publication Type, and click Next
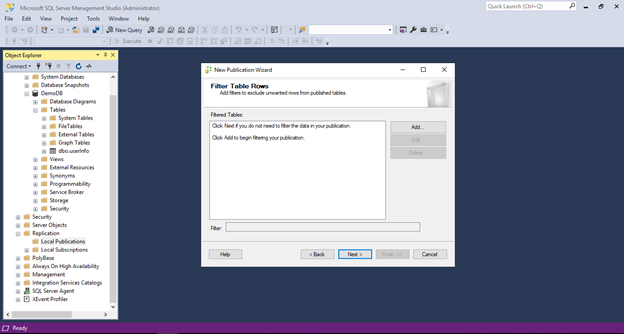
5. In the Articles page, choose all the objects that are part of the publication. In the case of this tutorial, it’s a full database migration hence, I select all the objects
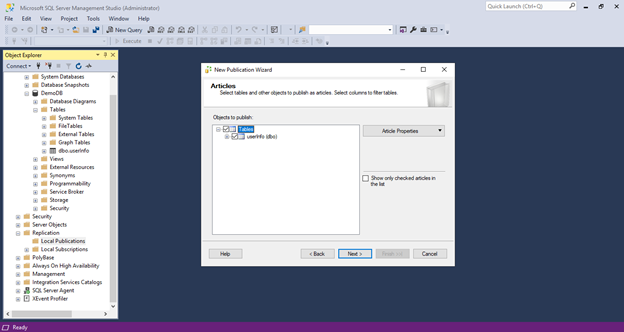
Note: Since we are doing a full database migration, we are not going to set up any type of table row filtering.
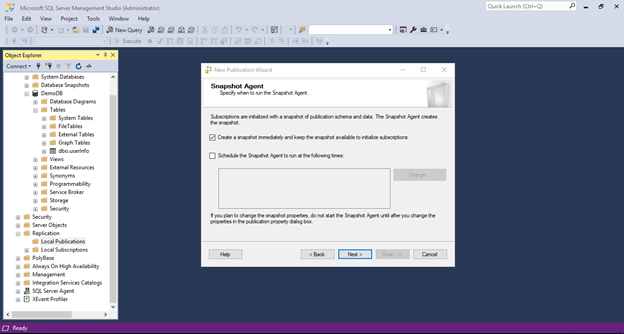
6. In the Snapshot Agent page select Create a snapshot immediately. We need to specify when we are going to run the snapshot agent that will create that first snapshot, which will then be applied to Azure SQL Database. In this case, we set it to create the snapshot immediately because we are going to initialize replication right away
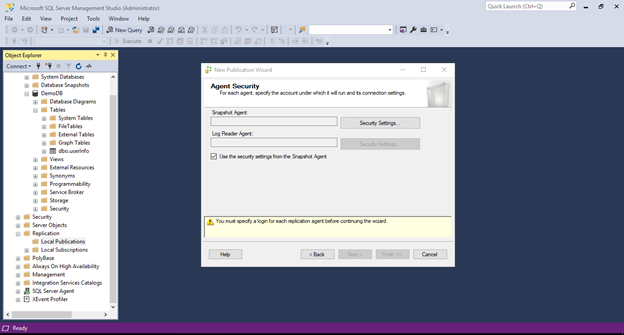
7. On the Agent Security page, configure the Snapshot Agent using Security settings
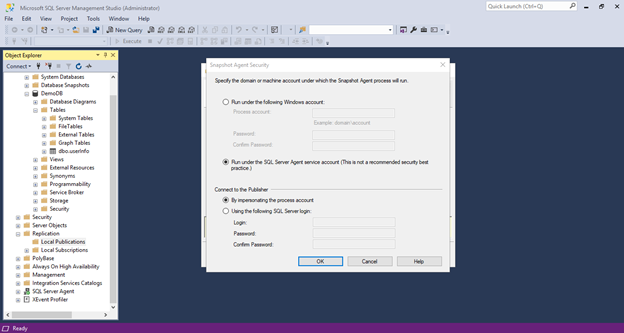
8. In this case, we use the SQL Server Agent service. In this step, the recommended setting is to use a domain account. But for demo purposes, I am just going to use the SQL Server agent service account
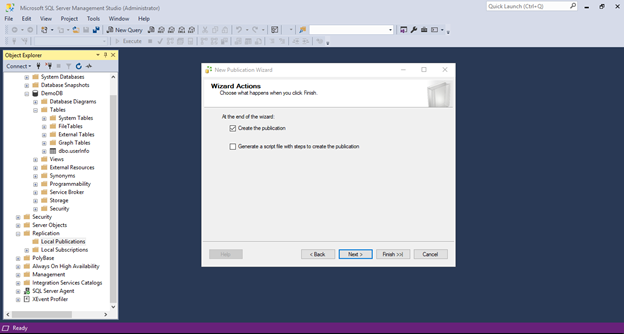
9. To complete the setup, click Next

10. To complete the setup, click Next
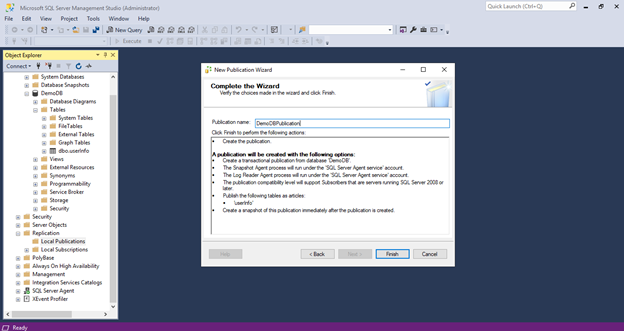
11. In the next page, type in the publication name and click Finish
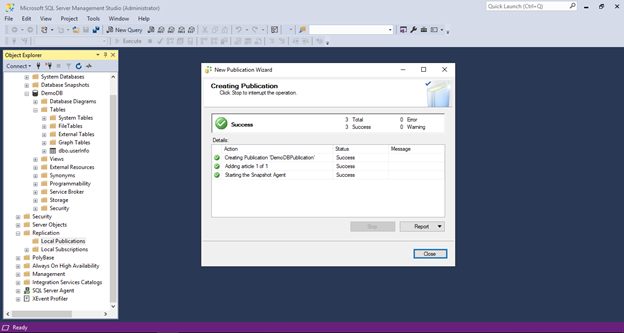
12. The publication setup progress appears. It summarizes the progress of the publication setup and configuration. In case of this tutorial, you would see that the “PublisherName” is successfully created. The wizard will take care of creating the publication, adding the articles, and then starting the snapshot agent to take that initial snapshot of the “DatabaseName” database
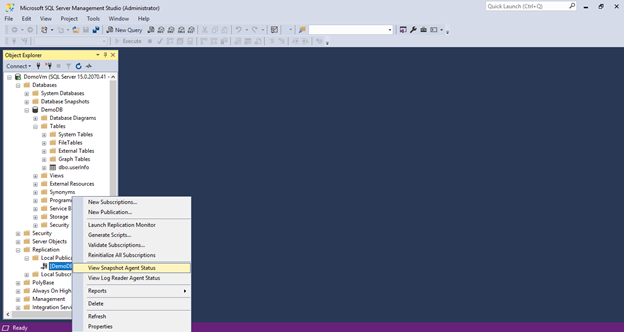
13. Browse the Publication folder to view the newly created publication. And Before start making the Subscriber, we should check the Agent Status.
Check Agent Status:
Here we are getting an error about Replicate Data access path is Denied. This error stops to generate snapshot.
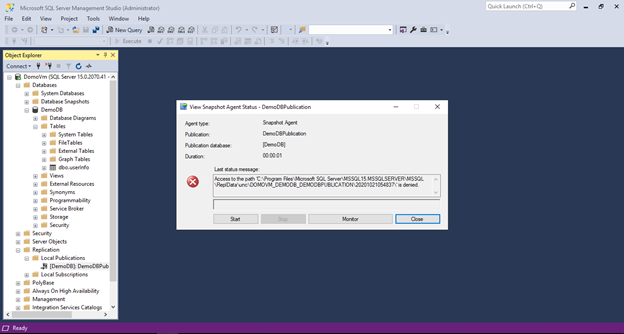
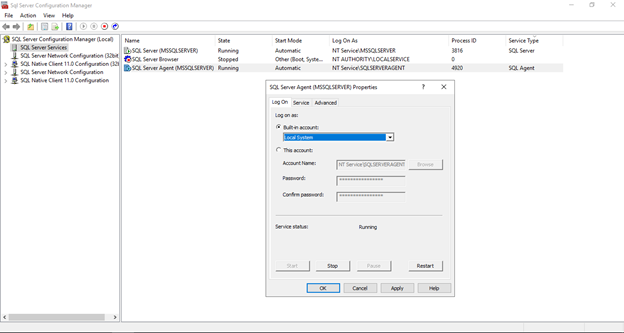
Solve this error:
Go to SQL Server Configuration Manager and right click on Server Agent then go to properties. After that change the Log on as to Local System. After that restart the Agent service.
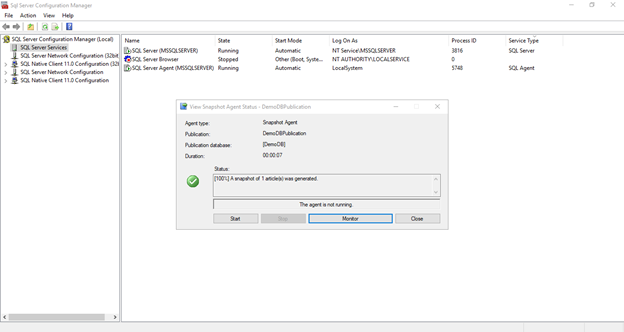
After changing the Agent log on then open the View Snapshot Agent Status. And click on Start button. And it will take the Snapshot.
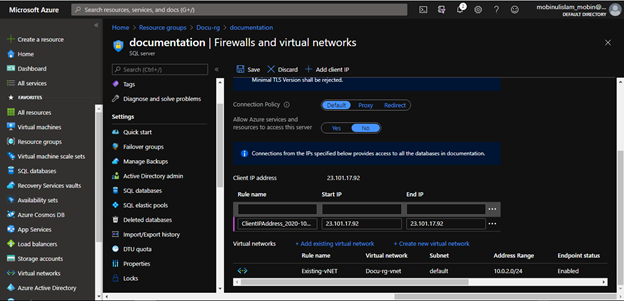
Configuration on Azure-Side:
- In Azure part, we have to add the client ID. For that we need to click on Show Firewall Settings.
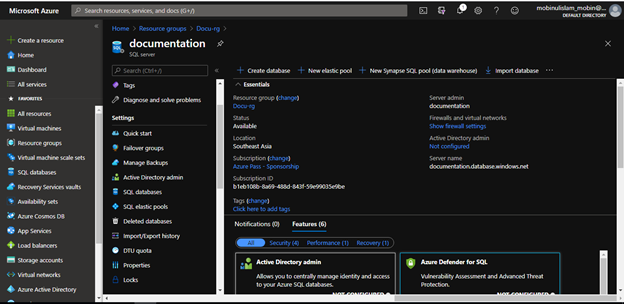
2. Click on Add client IP and Save.
Create Subscriber:
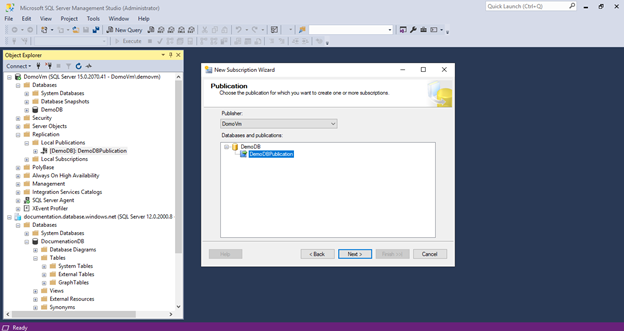
- In Object Explorer, expand the Replication folder, right-click Local Subscriptions, and then select New Subscriptions

2. As we only have one publication (the one that I just created), we’ll select it and click Next
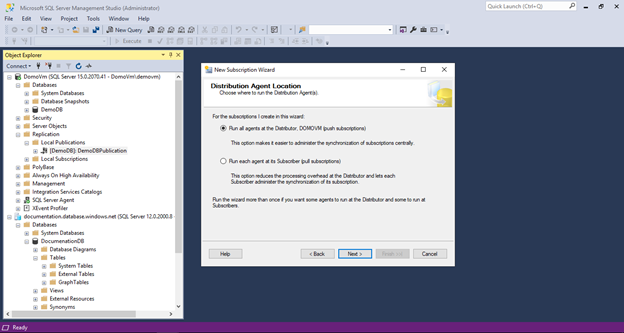
3. In a normal setup, we have the option of selecting where to run the distribution agent. But for Azure SQL Database, the first option will be it. Only push subscription works for Azure
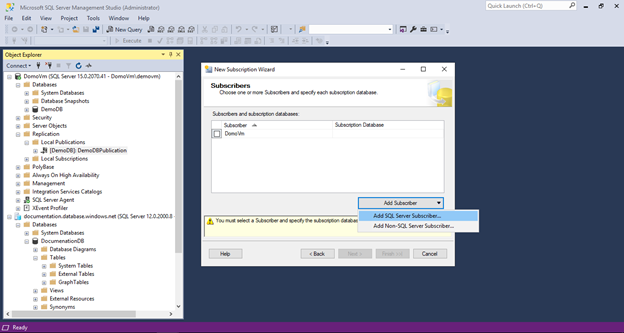
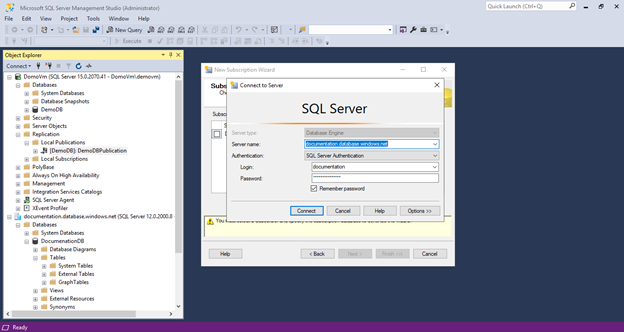
4. In the wizard, we have to select a SQL Server subscriber to add the Azure SQL Server
5. Here we have to login to our Azure SQL server.
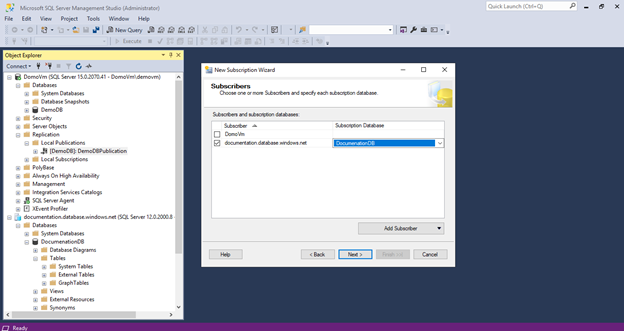
6. In this step, we have to select the destination Azure SQL database.
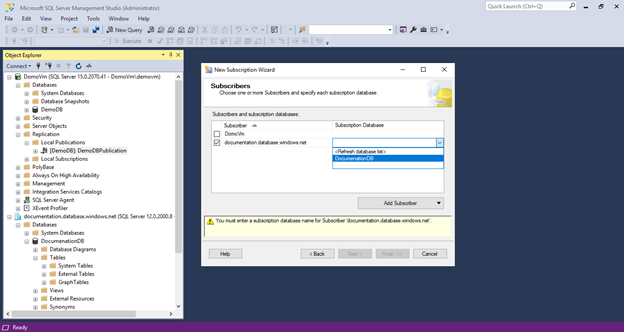
7. Make sure that only the Azure SQL server is selected.
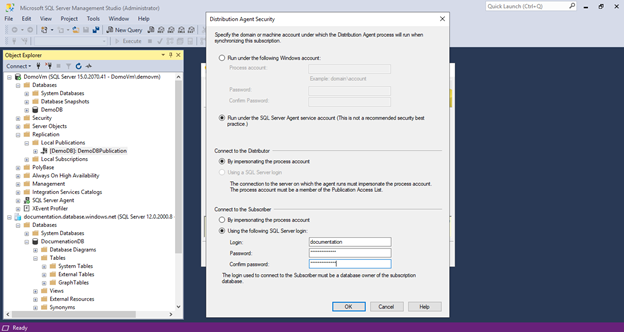
8. Next, We click on the 3 dot menu to connect with server.to connect to the distributer.

9. we’re just going to use the Run Under SQL Server Agent account, though normally you would use a separate domain account. Finally, to connect to the subscriber, we’re going to use a SQL login. In this case, I use a SQL account username and its password, to push the commands from the distributor
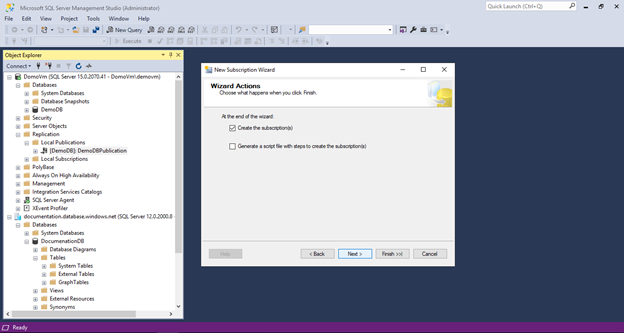
10. Keep as it is just click on either Next or Finish.
11. Keep as it is just click on either Next or Finish.
12. Keep as it is just click on either Next or Finish.
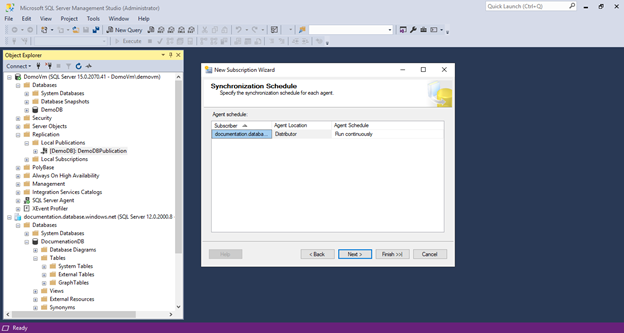
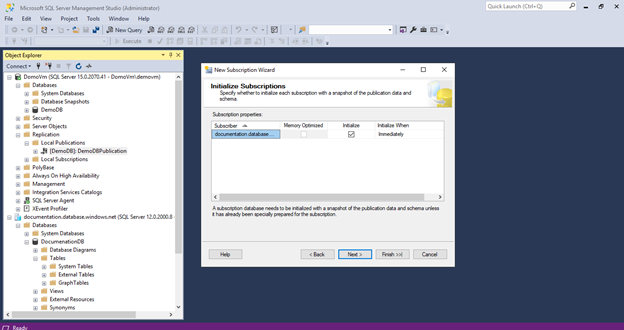
13. We can either run the replication continuously, run it only on demand when we actually execute the job, or we can also define a schedule for it. As it is part of the database migration, it is recommended to set it to run continuously, so both, the publisher and subscriber databases, will be in sync. Next, we’re going to initialize the subscription, immediately, as soon as we are done with the wizard. These are the default configurations that are used for the demo

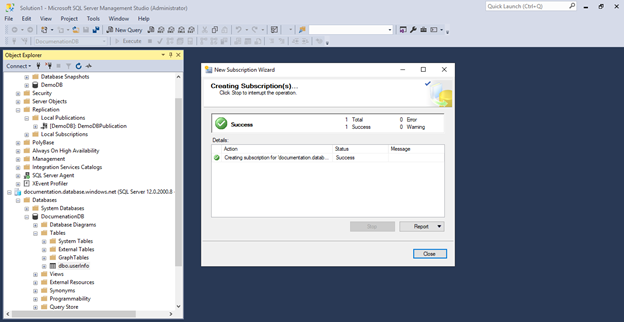
14. At this point, the Create subscription wizard will create the subscription to the Azure SQL Database
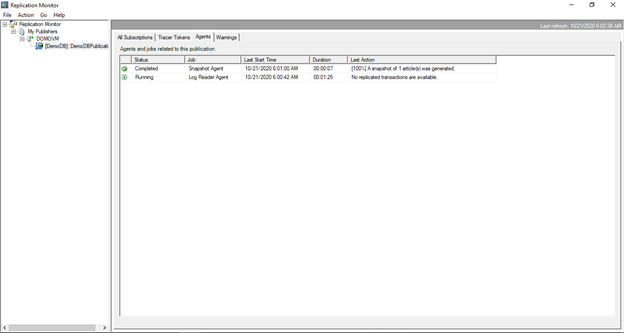
Check the Replication:
In the Replication Monitor, we can expand the publisher and click on the publication and get the status of the subscription that’s happening over the cloud
Create a new table on Existing On-premises SQL DB
We need to do this part when we will add a new table on our on-premises Database and want to synchronize this table to Azure SQL.
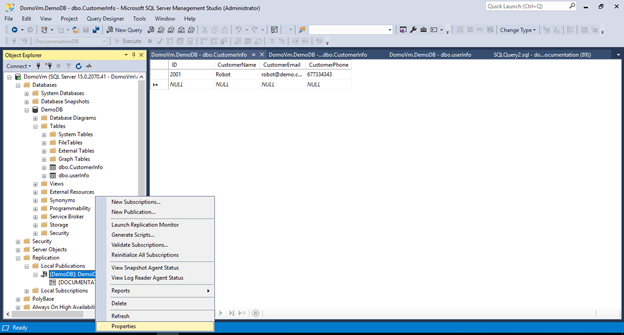
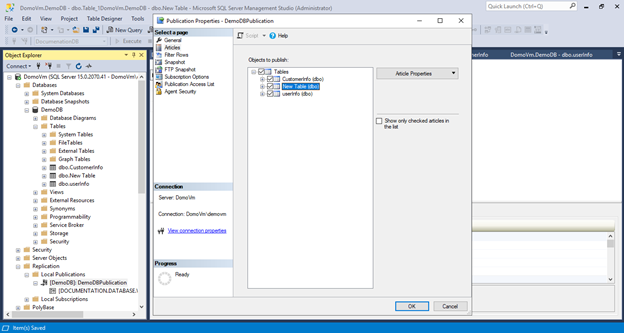
Publication Properties:
- In SQL Server Management Studio, Right click on Publisher and go to the Properties.
2. Click on Articles and uncheck the Show only checked articles in the list. And check the new table
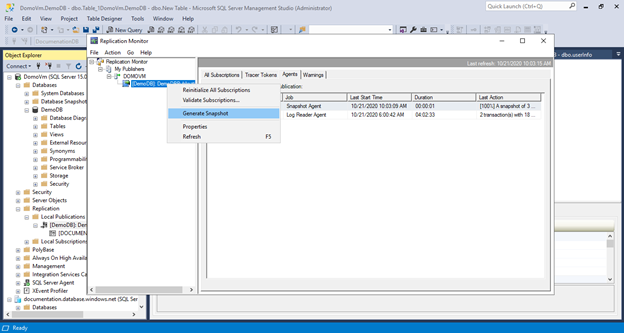
3. Open the replication Monitor and Generate a new snapshot.
4. After completing the last 3 steps, then right click on publisher again and click on reinitialize all subscriptions.